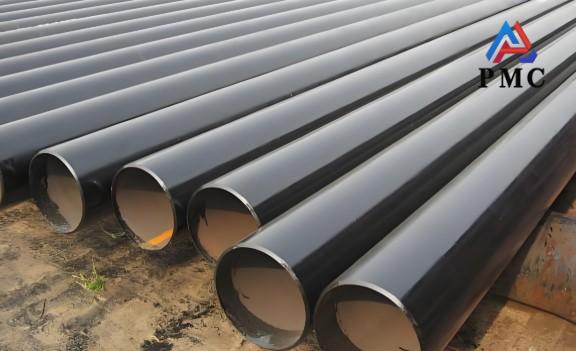
BS EN 10210 for Hot Finished Structural Hollow Sections
This part of this European Standard specifies technical delivery conditions for hot finished hollow sections of circular, square, rectangular or elliptical forms and applies to hollow sections formed hot, with or without subsequent heat treatment, or formed cold with subsequent heat treatment to obtain
equivalent metallurgical conditions to those obtained in the hot formed product.
Manufacturing process: BS EN 10210 mainly deals with hot-finished structural hollow sections of non-alloy and fine-grained structural steels. There are two production processes. One is the seamless process, in which the solid tube is heated and perforated, and then hot-rolled, cold-rolled or cold-drawn to gradually form the tube. There is no weld seam throughout the process, and the tube has excellent integrity and strength. The other is the welding process, in which the steel plate or steel strip is first rolled into a tube, and then welded by high-frequency resistance welding or submerged arc welding. Continuously welded products generally do not contain butt welds. After the product is formed, it may also be subjected to heat treatment such as normalizing as needed to optimize the internal structure and performance.
Classification:
Material classification
Non-alloy Steel: Also known as carbon steel;
Fine-grain steel: steels with fine-grain structure with an equivalent index of ferritic grain size ≥ 6;
Grade classification
|
Non-alloy Steel Grade |
S235JRH, S275J0H, S275J2H, S355J0H, S355J2H, S355K2H |
|
Fine-grain steel Grade |
S275NH, S275NLH, S355NH, S355NLH, S420NH, S420NLH, S460NH, S460NLH |
Section shape classification
Circular (HFCHS);
Square (HFRHS);
Rectangular (HFRHS);
Elliptical (HFEHS);
|
Chemical Composition for Hot Finished Circular Hollow Section |
|
|
Chemical composition – ladle analysis |
|
|
Hot Finished Circular Hollow Section |
|
|
Specification |
EN10210 S355J2H Part 1: 2006 |
|
% max |
|
|
Carbon |
0.22 |
|
Silicon |
0.55 |
|
Manganese |
1.60 |
|
Sulphur |
0.030 |
|
Phosphorus |
0.030 |
|
Carbon equivalent (CEV) mat T≤16mm |
0.45 |
|
Type of deoxidation |
Fully killed steel |
|
Mechanical Properties for Hot Finished Circular Hollow Section |
|
|
Specification |
EN10210 S355J2H Part 1: 2006 |
|
Tensile Strength Rm N/mm2: 3 ≤ T ≤ 100mm |
470 – 630 |
|
Yield Strength ReH Min, N/mm2: T ≤ 16mm |
355 |
|
Min Elongation % T ≤ 40mm on gauge length 5.65. √S0 |
22 |
|
Impact properties Minimum Ave energy (J) at -20°C |
27 |

|
Dimensional tolerances EN10210: 2006 Part 2 |
||
|
Square/Rectangular |
Circular/Ovals |
|
|
Outside dimension (D B and H) |
±1% with a min of ±0.5mm |
Circular ±1% with a min of ±0.5mm and maximum of ±10mm |
|
Thickness (T) |
-10% Note. Positive deviation limited by mass tolerance |
-10% Note. Positive deviation limited by mass tolerance |
|
Squareness of side |
90 degrees ±1 degree |
- |
|
External corner profile |
2T max at each corner* (EN10210 has 3T max). |
- |
|
Concavity/convexity (x) |
±1% of the side, measured independently of the tolerance on the outside dimension |
- |
|
Twist (V) |
2mm plus 0.5mm/m max. Section is placed on a flat surface with one end held flat. At the other end the height difference of the two lower corners is taken. |
– |
|
Mass (M) |
±6% on individual lengths |
±6% on individual lengths |
|
Straightness |
Max 0.2% of total length & 3mm over every 1m length |
Maximum 0.2% of the total length & 3mm over every 1m length. (The permitted tolerance is twice the value for H<250) |
|
Length |
+150mm/-0mm |
+150mm/-0mm |
* Excludes RHS 250 x 200, which is 3T max at each corner in line with EN10210
|
EN10210 CHS-Circular hollow sections – length and tolerances |
||||
|
Outside Diameter |
Welded |
|||
|
mm |
Thickness mm |
Standard mill lengths m |
Special mill lengths m* |
Tolerance mm |
|
21.3 – 42.4 |
All |
6.0, 6.4, 7.5 |
5.4 – 7.5 |
+150-0 |
|
48.3 |
All |
6.0, 6.4, 7.5 & 10.0 |
5.4 – 14.6 |
+150-0 |
|
60.3 – 114.3 |
All |
6.0, 6.4, 7.5 & 10.0 |
5.0 – 14.6 |
+150-0 |
|
139.7 |
All |
7.5 & 10.0 |
6.0 – 14.5 |
+150-0 |
|
168.3 – 193.7 |
All |
7.5, 10.0 & 12.0 |
6.0 – 14.6 |
+150-0 |
|
219.1 – 508.0 |
All |
10.0 & 12.0 |
6.0 – 14.6 |
+150-0 |
Read more: EN 10210-1 Hollow Sections-Seamless Steel Pipe


