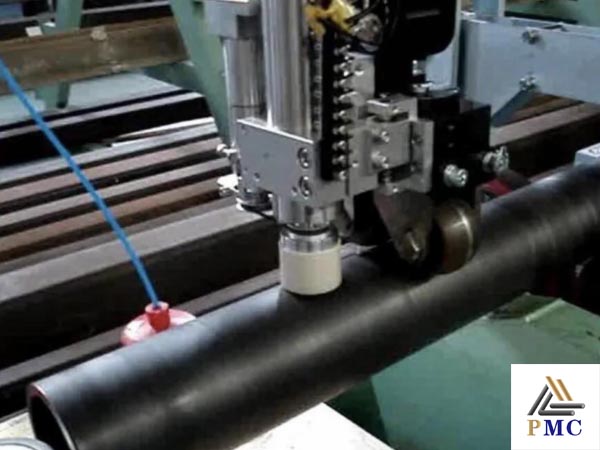
Eddy Current Flaw Detection Method for Seamless Steel Pipe
Non-destructive testing of steel pipes is a detection technology that detects internal or external defects on the premise of not damaging steel pipes. It has been widely used in major steel pipe manufacturers in recent years. The non-destructive testing techniques used in the production of seamless steel pipes mainly include ultrasonic testing, magnetic testing, eddy current testing and penetration testing. Various flaw detection methods have their own scope of use.

1. Advantages and disadvantages of various flaw detection
Advantages of eddy current flaw detection The flaw detection result can be directly output by electrical signal, which is convenient for automatic detection; due to the non-contact method, the flaw detection speed is very fast; it is suitable for the flaw detection of surface defects. The disadvantages are: the defects in the deeper parts under the surface cannot be detected; it is easy to generate cluttered signals; it is difficult to directly judge the type of defects from the display signals obtained by the detection.
Penetration testing is a flaw detection method based on the wetting ability of liquids to solids and capillary phenomena (including penetration and rising phenomena). Compared with other flaw detection methods, the advantages of penetrant flaw detection are that the equipment and flaw detection materials are simple, the defects can be displayed intuitively, and various defects in all directions can be displayed at the same time. The disadvantage is that it can only inspect the defects that the opening is exposed to the surface, and the operation process is complicated.
2. Eddy current inspection method for seamless steel pipe
According to the characteristics of industrial non-destructive testing, in order to realize the automatic control of the testing system, most of the eddy current testing of seamless steel pipes below 180mm in steel pipe enterprises adopts the traditional passing-through coil testing method. For seamless steel pipes over 180mm, if the traditional passing-through eddy current method is used for testing, there will be many problems, which are not allowed by national standards. The penetrating coil detects a circumferential surface of the surface of the steel pipe. In the eddy current flaw detection using the penetrating coil, the larger the diameter of the steel pipe to be detected, the larger the circumferential area detected by the coil, and the lower the signal-to-noise ratio. It is for this reason that the eddy current inspection standard for steel pipes stipulates that the outer diameter of the eddy current inspection using the through-type coil shall not be greater than 180mm. In addition, there are certain difficulties in the magnetization and demagnetization of the steel pipe in the through-type flaw detection of large-diameter steel pipes. Therefore, whether it is domestic or foreign, for the flaw detection of large-diameter steel pipes, point probe type eddy current flaw detection equipment is generally used.
3. Eddy current flaw detection method for multi-caliber seamless steel pipes
The detection sensitivity of point eddy current testing is very high, and it has a high detection rate for cracks and fold defects distributed along the axis of the steel pipe; in addition, point eddy current testing also suppresses ambient temperature and workpiece transmission vibration. effect of influence. More importantly, the form of point eddy current probe can adapt to the flaw detection requirements of steel pipes of different diameters.
(1) First, according to the actual situation of the production line, the flaw detection method of the steel pipe spirally rotating along the production line and the probe being fixed is determined. While making the steel pipe rotate forward, let the point probe close to the surface of the steel pipe to complete the scanning of the entire outer surface.
(2) Determine the structure of the flaw detection system. First, put the six-channel eddy current probe into a probe trolley, adjust the probe trolley to meet the requirements of the diameter steel pipe to be tested by adjusting the screw, and then use the cylinder pushing and fine-tuning method to make the detection probe always press tightly against the workpiece. The surface of the workpiece is inspected, and a pair of universal wheels are installed at both ends of the probe trolley to keep a certain distance between it and the inspected workpiece.
(3) Determine the number of probes. The point probe flaw detection method needs to use multiple detection probes to increase the scanning pitch and improve the detection speed. Eddy current point probes are generally small in size and have high detection sensitivity, but at the expense of the detection speed. Increasing the coverage of the detection area of the probe can improve the detection speed, but the detection sensitivity will decrease.
Go here if you are looking for “ 3 Commonly Used Non-destructive Testing Methods for Seamless Steel Pipe”


