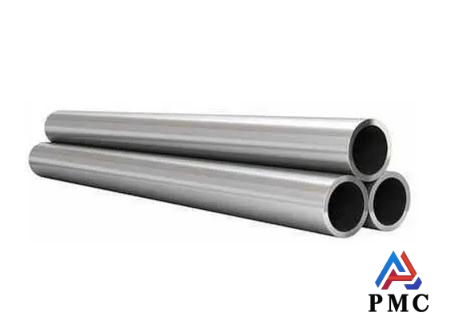
How to Solve the Uneven Wall Thickness of Stainless Steel Welded Pipes?
Uneven wall thickness of stainless steel welded pipe and its hazards
In the production and use of stainless steel welded pipes, uneven wall thickness is a common and non-negligible problem. Its main manifestations are various, including spiral wall thickness unevenness, that is, the wall thickness changes in a spiral shape along the length of the steel pipe, just like the texture of a screw; linear wall thickness unevenness, in a straight line section of the steel pipe, the wall thickness is obviously inconsistent; and head and tail wall thickness unevenness, that is, the wall thickness of the head and tail of the steel pipe is greatly different from that of the middle part, either thicker or thinner.
Uneven wall thickness has many negative effects on the quality and use of stainless steel welded pipes. From a quality perspective, this will destroy the overall structural stability of the steel pipe and make the performance of various parts of the steel pipe inconsistent. During use, if used in pressure-bearing systems, such as water pipes, gas pipes, etc., the parts with thinner walls cannot withstand normal pressure and are prone to deformation or even rupture, causing leakage and affecting the normal operation of the system; if used for building structure support, uneven wall thickness will reduce its bearing capacity and cannot guarantee the safety and stability of the structure, which may cause safety accidents in serious cases.
Reasons for uneven wall thickness of stainless steel welded pipes
The uneven wall thickness of stainless steel welded pipes is caused by the combined effect of multiple complex factors. From the perspective of equipment and process parameter adjustment, the piercing machine rolling line is not straight, just like a car deviating from the established track, which will cause uneven force on the tube billet during rolling, resulting in spiral uneven wall thickness along the entire length of the steel tube; The two rolls have different inclination angles, which results in different rolling forces on both sides of the tube billet, which will also cause the same problem of uneven spiral wall thickness. This situation will also occur if the front pressure of the mandrel is too small and the tube billet cannot be fully deformed.
During the rolling process, if the centering roller is opened too early, it is like loosening the stable control of the tube in advance, or the centering roller is improperly adjusted and the push rod shakes, which will cause the tube to move unstably and lead to uneven spiral wall thickness. The height of the mandrel pre-piercing saddle is not appropriate, which makes the contact between the mandrel and the rough tube abnormal. The temperature of the tube billet drops too quickly on the contact surface, which will produce linear wall thickness unevenness or even concave defects; Too small or too large gap between the continuous rolling rolls and deviation of the center line of the tube rolling mill will affect the pressure distribution during rolling, resulting in uneven linear wall thickness.
From the perspective of raw materials, if the cutting angle or curvature of the front end of the tube blank is too large, or the centering hole is not straight, it will be like a crooked wood that is difficult to be processed regularly during perforation, which will easily cause uneven wall thickness at the head of the steel pipe. If the elongation coefficient is too large and the roller speed is too high during perforation, the rolling process will be unstable, causing uneven wall thickness at the head and tail; if the perforator is unstable, it will easily cause uneven wall thickness at the tail of the rough pipe.

Five key measures to solve the uneven wall thickness of stainless steel welded pipes
1. Precision calibration of equipment
Calibrate the rolling center line of the piercing machine to ensure that the inclination angles of the two rollers are consistent (error ≤±0.5°).
Optimize the control logic of the centering roller, dynamically match the opening time and the rough pipe outlet speed, and automatically compensate the opening as the pipe diameter changes (accuracy ±0.1mm).
2. Process parameter optimization
The front pressure reduction of the plug is controlled at 30%-40% of the wall thickness to ensure sufficient deformation of the metal.
The decreasing multi-frame pressure distribution (first frame 35% → last frame 15%) is adopted, and the roll gap is adjusted in real time with online thickness measurement.
3. Raw material quality control
The cutting inclination of the front end of the tube billet is ≤1.5mm/m, the curvature is ≤L/1000, and the eccentricity of the centering hole is ≤0.5mm.
The thickness of the parent material is measured in full size (accuracy ±0.05mm) when it enters the factory, and the batches that exceed the tolerance are returned.
4. Operation specification implementation
The ejector rod is regularly inspected and replaced, the lubrication frequency is increased to once every 2 hours, and vibration is suppressed (amplitude < 0.5g).
The welding current/voltage fluctuation is controlled within ±5% to ensure uniform heat input.
5. Full process inspection feedback
Deploy 8 sets of ultrasonic thickness gauges to cover 100% of the pipe wall inspection (accuracy ±0.02mm).
Establish a defect database, analyze trends through SPC, and trace process discipline for out-of-tolerance batches.
Read more: Can Stainless Steel Welded Pipes be Made into Thick-walled Pipes?


